Coffee Gadgets That Are Surprisingly Portable
Hey coffee friends—it’s Imani again. On a recent backpacking trip, I brewed an espresso-style shot at 6 AM beside a campfire. My buddy Jake watched, wide-eyed:
“How did you pull café-quality coffee out here with gear that fits in a day-pack?”
That moment drove home a truth: a new wave of portable coffee gadgets delivers pro-level results without taking over your pack. If you’re assembling smart travel coffee gear, the goal isn’t “tiny at all costs”—it’s consistent brewing with the least fuss.

Quick Answer: Portable coffee gadgets are lightweight, packable tools that let you brew quality coffee while traveling—without bulky machines. The best options include a handheld espresso maker, a collapsible pour-over dripper, a pocket burr grinder, and a mini scale. Pair them with good beans and hot water for café-level results anywhere.
- Handheld espresso maker (camp + hotel)
- Collapsible pour-over dripper (ultralight)
- Pocket burr grinder (freshness)
- Mini scale (repeatability)
- All-in-one kit (organized travel)
Rethinking “Portable” Coffee
| Old Assumption | New Reality |
|---|---|
| Instant ≈ travel | Some manual espresso devices advertise “9 bar,” with real-world pressure varying by technique and grind |
| Bulky camp percolators | Collapsible drippers can fold flat in a laptop sleeve |
| Compromise flavor | Specialty-grade burr grinders & 0.1 g scales can fit in pockets |
What makes modern gear truly portable?
Size efficiency • Featherweight materials • Multi-function design • Simple, durable construction
Best portable coffee gadgets (what’s actually worth packing)
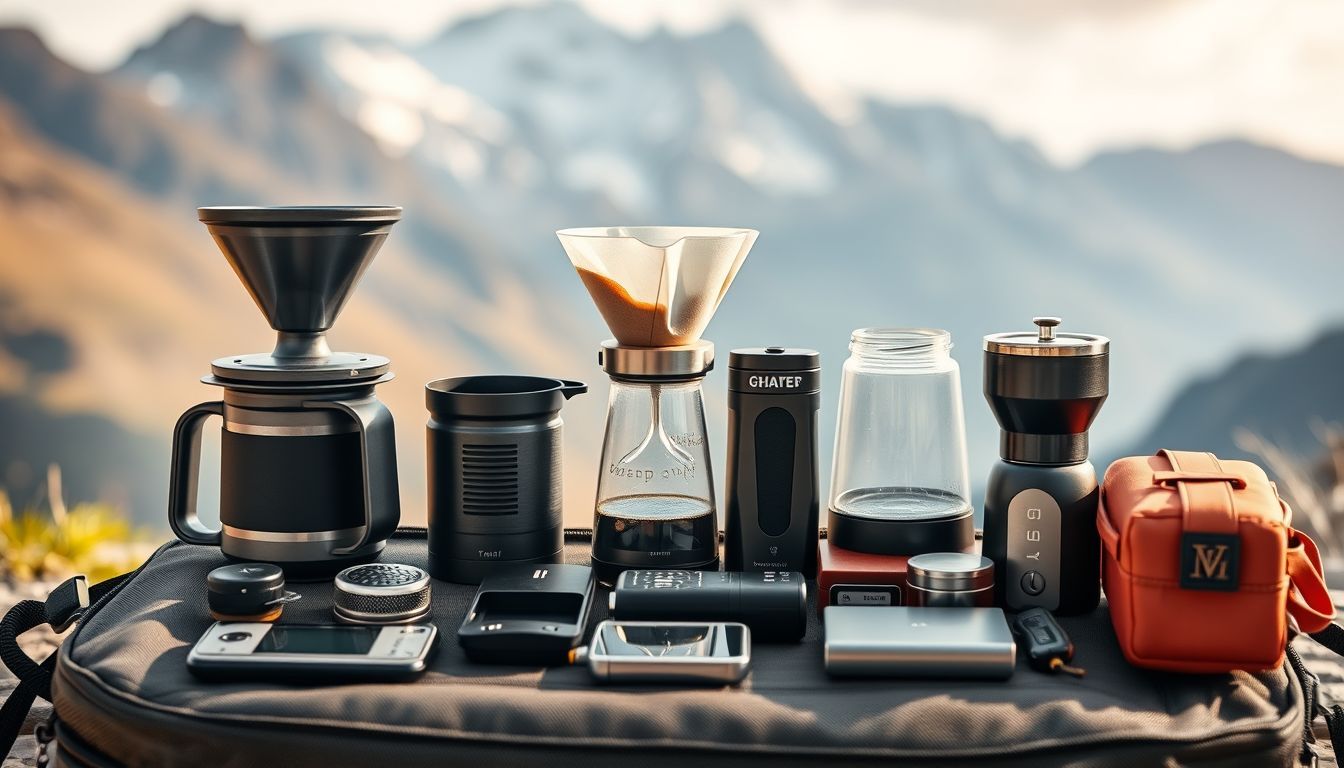
Here’s a quick, practical comparison to help you match the gadget to your trip style. Flat lay of portable coffee gadgets—collapsible pour-over dripper, pocket grinder, mini scale, AeroPress Go, filters and accessories—showing a travel-ready setup.
| Gadget | Brew | Typical weight | Best for | Tradeoff |
|---|---|---|---|---|
| Handheld espresso maker | Espresso-style | 8–16 oz | Hotel rooms, car camping, “I need espresso” mornings | Needs hot water (unless heated model); technique-sensitive |
| Collapsible pour-over dripper | Pour-over | 2–4 oz | Ultralight trips, simple cleanup | Needs filters + kettle/pour control |
| Pocket burr grinder | Any (grind prep) | 6–12 oz | Fresh flavor anywhere | Hand grinding takes time/effort |
| Mini scale | Any (measurement) | 3–6 oz | Repeatable results, dialing in | One more thing to charge/pack |
| All-in-one travel kit | Varies | 1–2 lb | Organized coffee setups for road trips | Heavier than a minimalist setup |
1) Handheld Espresso Makers
What you need to brew (water + grind + heat source)
A handheld espresso maker is the closest thing to “espresso anywhere,” but it still needs the basics: hot water, the right grind, and enough dose for your basket. Some models heat water (usually via USB-C), while others assume you’ll boil water on a stove or use a kettle.
In the field: On my last trip, I dosed 17 g of medium-fine coffee and pulled ~34 g out in about 30 seconds using near-boiling water from a backpacking stove. The shot wasn’t identical to a café machine—but it was rich, sweet, and very real coffee.

Realistic results (espresso-style vs true espresso)
About that “9 bar” talk: some devices advertise 9 bar (or higher), but real-world pressure at the coffee can vary depending on grind, dose, preheating, and how steadily you pump/press. The good news is you can still get dense, crema-topped, espresso-style coffee that plays great with milk or straight.
If you’re choosing the best portable espresso maker for trips, prioritize three things: heat strategy (boil vs built-in), basket size (dose capacity), and workflow (how fast you can repeat a shot).
- Trail favorite: OutIn Nano Portable Electric Espresso Machine (espresso-level pressure; some versions advertise bar ratings, but technique still matters)
Typical specs
Price: $90–$200
Weight: 8–16 oz
Output: ~30–60 mL per pull (espresso-style)
Best for: hotel rooms, car camping, early-morning “need espresso” moments
Not ideal for: ultralight minimalists, espresso purists who want café-level consistency shot after shot
Pro tip: Pre-dose beans into small tubes/bags (18–20 g). It speeds up mornings and makes dialing-in much easier when you’re tired and it’s cold.
If your shots channel (common with travel setups), this breakdown on puck screen vs paper filter on espresso will help you choose the least-fussy fix.
2) Collapsible Pour-Over Drippers
The simplest path to great travel coffee is still pour-over. Silicone (or flexible polymer) ribs hold a cone shape, then the whole thing folds flat. A collapsible pour-over dripper is my default when I want great cups with minimal moving parts.
- Pick: Attsky Collapsible Pour-Over Dripper (packs flat; typically ~2–4 oz; brews up to ~16 oz)
If you don’t need it to fold flat and want a classic cone for hotel brewing, the Hario V60 is a reliable option. I’ve also had great results with the DOWAN Pour Over when durability and consistent flow matter more than pack-flat size.
Typical specs
Cost: $25–$45
Weight: 2–4 oz
Best for: backpacking, hotel coffee that doesn’t taste like hotel coffee, easy cleanup
Not ideal for: windy conditions without a stable pour setup, anyone who hates carrying filters
Pro tip: Bring a windscreen for your stove—water temperature consistency matters more outdoors than people think, especially for pour-over extraction.
3) Pocket-Sized Burr Grinders
A compact burr grinder is the flavor upgrade that makes every other gadget feel “worth it.” If you’re deciding how small you can go without wrecking flavor, see my guide to the best coffee grinders for every budget and brewing method.
- Go-to: JavaPresse Manual Stainless-Steel Grinder (wide grind range; travel-friendly form factor)
Typical specs
Price: $60–$150
Weight: 6–12 oz
Size: ~2 in Ø × 7 in
Best for: anyone using whole beans, dialing in handheld espresso or pour-over on the road
Not ideal for: large groups, ultra-rushed mornings (hand grinding takes a minute)
4) Mini Precision Scales
Scales aren’t glamorous, but they remove the guesswork—especially when you change water, altitude, or brewer. Credit-card-ish dimensions and 0.1 g readability are common now, and many include a timer.
- Carry: KitchenTour Coffee Scale with Timer (compact; up to 3 kg capacity)
Typical specs
Cost: $20–$40
Weight: ~3 oz
Best for: repeatable recipes, dialing in grind on the fly
Not ideal for: strict ultralight setups where “close enough” is the whole philosophy
5) All-in-One Travel Kits
If you like being organized (or you’re packing for two), an all-in-one kit keeps filters, tools, and dosing tidy. It’s also the least likely way to forget something critical.
- Example: Basal Coffee Traveller Kit (room for multiple brew styles and accessories)
Typical specs
Investment: $150–$300
Weight: 1–2 lb
Best for: road trips, shared lodging, “everything has a place” packing
Not ideal for: backpacking, minimalists who want one tool and done
6) AeroPress Go: The Pocket Multitool
AeroPress Go Travel Coffee Press Kit is the all-rounder: immersion, light pressure, and quick cleanup in one compact tube. Filters and stirrer nest inside the mug lid, which makes it easy to throw in a day bag.
Best for: fast brewing, forgiving recipes, easy cleanup
Not ideal for: people chasing espresso texture without add-ons
Packing checklist (so you don’t forget the one thing that ruins mornings)
- Brewer: handheld espresso maker or pour-over dripper
- Grinder: only if you’re bringing whole beans
- Filters: pre-counted in a zip bag (plus a few extras)
- Mini scale (optional): for repeatability and faster dialing-in
- Small towel + brush: cleanup is the real “luxury” on the road
Build Your Portable Quiver
- Start with one hero tool (a dripper or an espresso device).
- Upgrade the grinder next for the biggest flavor jump.
- Add a mini scale if you want repeatable recipes in changing conditions.
If you’re building this kit slowly, start with the best budget coffee equipment that punches above its weight and upgrade only what you actually use.
Portable no longer means compromise—the finest cup of the month might be the one you sip at sunrise on a ridgeline. Pick one brewer, then upgrade the grinder next—fresh grind is the biggest flavor leap in portable coffee gadgets.
– Imani
FAQ
What grind size works best for handheld espresso makers?
Aim for espresso-fine to medium-fine, then adjust based on flow. If it gushes watery in under ~20 seconds, go finer. If it stalls or tastes harsh and dry, go a touch coarser (or reduce dose).
Do I need preheated water, or can the device heat it?
Many handheld devices require you to bring hot water (kettle or stove). Some models include electric heating, but it’s slower and battery-dependent. For consistent results, near-boiling water plus preheating the brew chamber is the easiest win.
Is a mini scale worth packing for travel coffee gear?
If you care about repeatability, yes. A scale helps you keep the same coffee-to-water ratio even when your mugs, filters, and grind behave differently on the road.
How do I prevent bitter coffee when brewing outdoors?
Bitterness outdoors usually comes from water that’s too hot for your grind (or a brew that runs too long). Try a slightly coarser grind, shorten brew time, and keep your kettle pour steady. Wind protection helps keep temperature stable.
What’s the easiest cleanup option for backpacking?
Pour-over with paper filters is the simplest: lift, drain, toss. AeroPress-style brewers are also easy—just pop the puck and wipe. Espresso-style devices take the most rinsing.
How do I make travel coffee taste “less flat”?
Use fresher beans, grind right before brewing, and measure your ratio. Most “flat” travel coffee is old pre-ground coffee plus inconsistent water temperature.
Disclosure: As an Amazon Associate I earn from qualifying purchases at no extra cost to you. Links verified January 25, 2026.